AECP: Level 1 Final Challenge Feminine cards set
Hello,
I am so happy to showcase my Level 1 Final Challenge for AECP. I have been challenged to complete 2 sets of cards - feminine and masculine cards, and to choose 3 classes in level 1 to incorporate the elements learnt in my cards. For my feminine cards set, I chose “Let it Shine”, “Irresistible Inking Techniques” and “Clean and Simple Boutique Cards”. There are 3 horizontal and 3 vertical cards in each set, making each total to be 6 cards per set. I recycled one of my plastic packages from a previous purchase and used it to package my cards.

My feminine card designs were based on the Bride-to-Be stamp set. Using the different floral images in the set, I was able to create 6 different designs and layout. I used the sentiments from Floral Shadow stamp set in all of my cards. Each card with various sentiments vary a little but they all have a similar and cohesive theme as the rest of the set. All my cards have floral images, the sentiments are embossed in gold embossing powder and I use gold mirror card stock in all my cards. I used mainly Rose Quartz, Puffy Heart, Rubellite, Grapevine and Ruffleberry Altenew inks for my card projects. I cut out all my panels to be 4” by 5.25”, before any stamping was done. I used Versamark and Altenew gold embossing powder to emboss all my sentiments for all the cards.
For my first card, I wanted to position the sentiment in the center of 2 rows of floral designs. I cut out a strip of card stock that is 1 inch thick. Then, I traced the strip of paper onto my panel before stamping as a guide on where to stamp my images. Using my MISTI, I stamped the floral images above and below the lines that were traced.


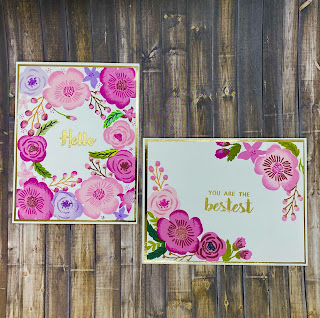


I cut out masks using post-it tape for each floral design. With that, I am able to stamp the other floral branches and smaller images around the masks. Once I am happy with my layout, I embossed my sentiment with Altenew gold embossing powder and added 2 strips of gold mirror card stock on the top and bottom of the embossed sentiment strip. I foam mounted the sentiment strip on the center of the panel, and also foam mounted the entire panel onto the card front.

The second card shows the floral images toward the lower half of the panel. Using my MISTI, I stamped all the floral stamps and twigs on the panel. Using the masks I made previously, I continued to create my design for my panel. I embossed my sentiment in the center of my panel. I glued my panel toward the lower right side of a gold mirror card stock. In this way, the gold card stock is only on the top and left side of the panel. And then I glued them onto the center of my card front.
My third card has a vertical design. I stamped all the floral images toward the top and bottom of the panel, leaving the center blank for the sentiments. I like using the smaller stamps in the stamp set (such as the dots for the center of the flowers) to fill up any white small spaces.

I stamped the sentiment with Versamark and then emboss in gold embossing powder. Once the sentiments are embossed, I adhered 2 strips of gold mirror card stock to the top and bottom of the stamped panel. Then, I glued the entire panel to a card front.

The floral design on the fourth card is stamped on the top left and bottom right of my panel. I die cut a circle from a card stock and temporarily adhered it onto the center of the panel. Using different color tones, I overlapped some of the images onto the circle cut out.
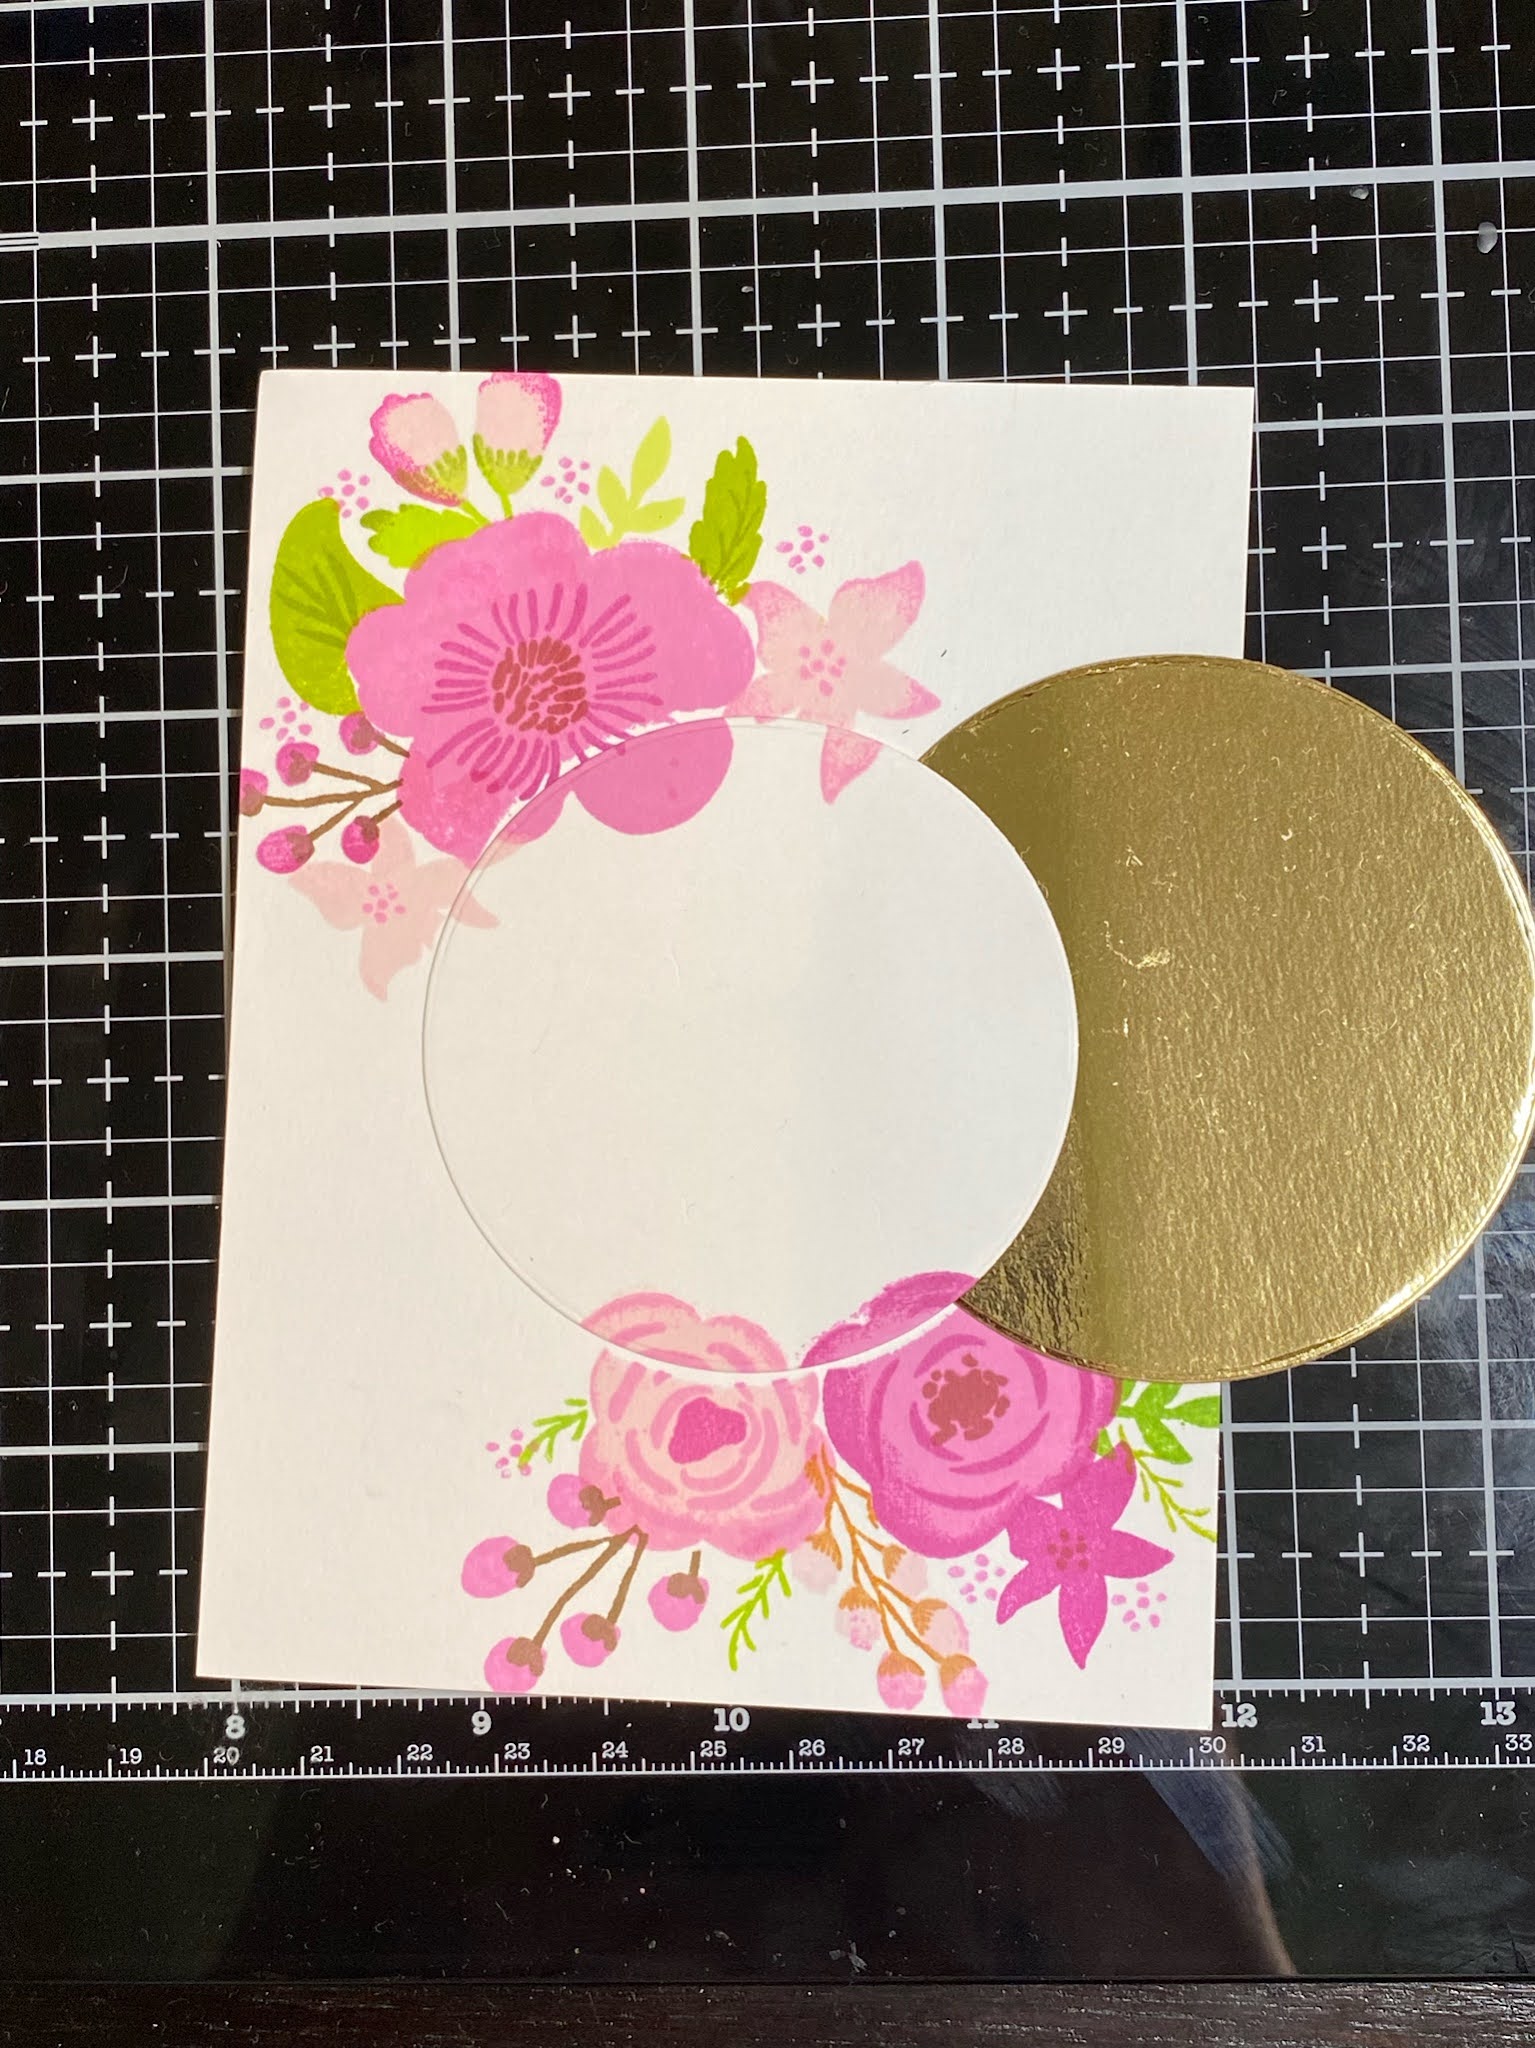

I stamped the sentiment on the center of the circle die cut and embossed with gold embossing powder. Then, I die cut a slighter bigger circle from a gold mirror card stock and added it to the back of the circle card stock. I adhered the floral panel onto a gold mirror card stock and glued it onto the card front. I also foam mounted the circle cut outs onto the center of the floral panel, arranging it in a way that the floral images are aligned.
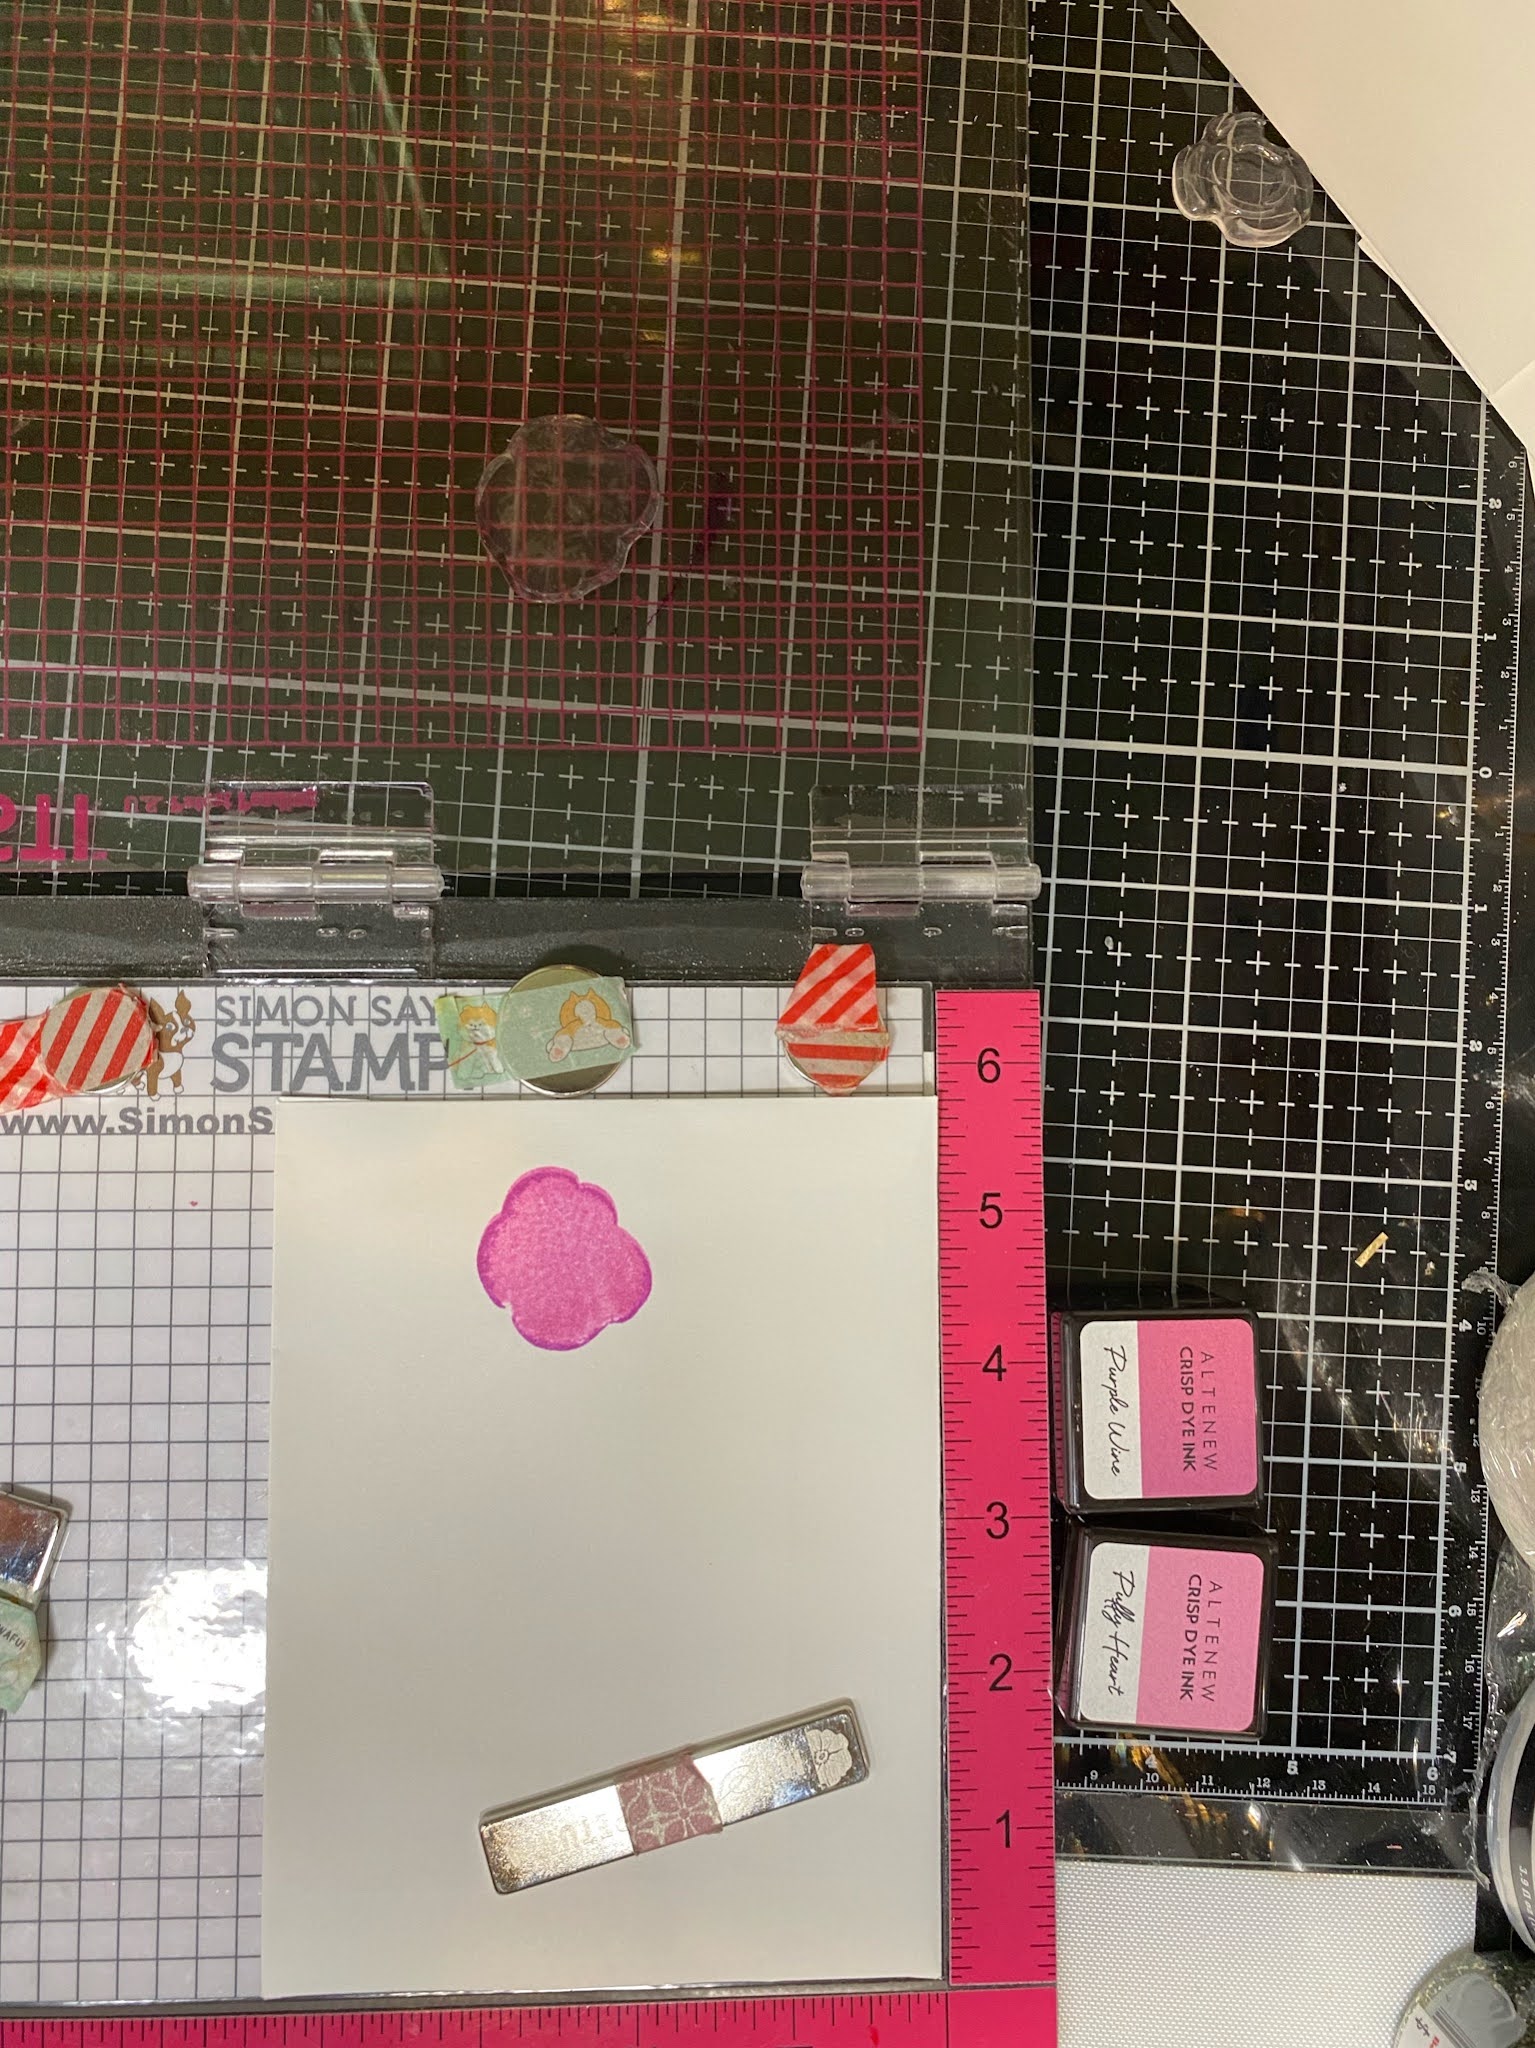
The floral images on the fifth card is stamped around the perimeter of the panel. I stamped the larger floral images first and then fill up the smaller spaces with smaller florals and leaves. Once again, I used the dotted stamps to fill up any remaining white spaces between the images.

I like to add 2 color tones on some of my images to give it some depth and interest. I use a lighter color on the image first and then add a darker color on just the perimeter of the stamp. Stamping my images this way helps to stretch the use of both my colors and stamps used in my projects. I stamp the sentiment in the center of the panel and emboss it in gold embossing powder. I glued my panel onto a gold mirror card stock and adhere the entire panel onto the card front.
My floral images on the sixth card are stamped on the top right and bottom left of a horizontal panel. I used the small branch stamps to “stretch” the position of the images. It helps create an illusion that the floral arrangements are longer. I added some leaves and smaller buds at the corners. I stamp the sentiment and emboss it in gold embossing powder. I foam mounted the stamped panel onto a gold mirror card stock and glued the entire panel onto a card front.
I like to add a little shine and shimmer on my cards, so I used my Nuvo glittler pen to add some sparkle on the center of each flower and smaller buds for all my cards. The amount of shine is subtle and is not too distracting.
I like to have coordinating envelopes for my set of cards. I stamped 6 white envelopes with the same floral images and color combination to match my cards using my MISTI tool.

To package my set of cards, I reused an acetate box from a previous purchase. I like that the cards and envelopes fit nicely into the box. The transparent nature of the box allows the cards to be displayed. I also added a small satin ribbon around the box.


This is a really fun and enjoyable learning process. It is quite a challenge as I had to make use of what I have to come up with the set of cards. I get to stretch my creativity and have tons of fun at the same time. I hope you like this long tutorial and will also try to make a gift set of your own.
Have a great week,
Juliet

Oh my goodness, Juliet! What a gorgeous set of cards!! These look like they were printed! So amazing!! You did a fabulous job! Thank you for submitting your work to the AECP assignment gallery.
ReplyDelete