Posts

Showing posts from July, 2021

AECP: Easy Die Cutting Techniques

Image
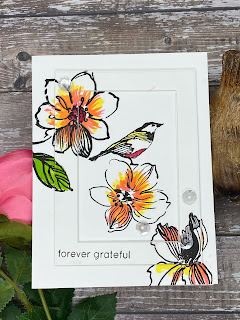
 Hello, I am very happy to share what I learnt in the “Easy Die Cutting Techniques” course. I die cut from standalone dies as well as coordinating dies. Die cutting is really fun, and in today’s blog, I used my dies in different ways. My first card uses Altenew’s Build-A Flower: Stargazer  stamp set and coordinating dies as well as Altenew’s Layered Floral Cover die A.  I used the Layered Floral Cover die A  as a stencil for my background of my card panel. After stenciling with a light purple Altenew’s ink, I set my panel aside and stamped the images from the Stargazer  stamp set. I die cut the images using the coordinating dies. I prepared a A2 card panel and adhered a strip of gold mirror card stock and a thin strip of black glitter card stock on the left of the card. I stamped the small flowers on the background and foam mounted my floral image and leaves. I gave my floral some sparkle with my Nuvo glitter pen and added a few sequins for some interest. My second card showcases Alten

AECP: Seasonal Scene Building

Image
 Hello, Welcome back! Today’s blog post is all about scene building. You could mask your stamped images to create overlapping images in a scene, use oversized images to create impactful cards, create backgrounds using ink blending, pattered paper with die cuts and elements, use frames to create windows as a well as shaker cards.  These are just some of the techniques you can use to create beautiful cards. My first card features Altenew’s Wild Hibiscus  stamp set to make a card with a frame. I die cut 4 rectangular frames from my nesting dies. I glued 3 of them together first. Using my MISTI, I stamped my images onto the card front. I laid 1 of my rectangular frame onto the card panel and stamped the same images on it. Then I glued this rectangular frame with the the rest of the frames and adhered them to my card front. I used Altenew’s watercolor brush markers to color the images and stamped a sentiment on the frame. The frame adds some interest to a flat panel. Part of the image is fr

AECP: Celebration:Stencil Techniques

Image
 Hello, Welcome back! Today I got to play with some of my stencils using the techniques taught in this course. My favorite technique is using dies to create my own stencils. It is such a wonderful way to stretch my dies. I get to play my stencils and had lots of fun. My first card features Altenew’s Sketched Lines  stencil. I used blue ink on the stencil and then added a layer of Ranger’s stickles glitter gel over it. After letting it dry, I rubbed some blue ink on top of the stenciled image using my blending tool. Then, I trimmed my panel down to 3.5” by 4.5”. I embossed some dots using Sunny Studio’s Lots of dots  embossing folder on my card front. I wrapped some twine onto the stenciled panel. I die cut 4 “hello” in white card stock using Altenew’s Fancy Hello die and stacked them up. I used a holographic paper for the top die cut. I adhered my stenciled panel to my card front using foam tape and pasted my hello die cut and some iridescent bubbles.  My second card uses Altenew’s Flo

AECP: Let it shine!

Image
 Hello, Welcome back! Today I will be using glittery and shiny stuff to make my cards. “Let it Shine” is all about using sequins, glitter, gold glitter card stock or ribbons, foil, embossing powder… anything that can help make the card glittery and / or shiny. I love using glitter or anything shiny on my card. My first card features Altenew’s Classic Pine Stencil A and B . I used brown and green Altenew ink to color the stencil images. Then, I used Ranger’s Diamond stickles over all the pine cone images to give it a glittery effect. Once that is dry, I embossed my sentiment using Altenew’s Warm Blessings  stamp set in gold embossing powder on a piece of vellum. I wrapped the vellum around the card panel before adding 2 green card stock to the back of my panel.  I foam mounted my panel onto my card front. The glitter on the pine cones are sparkly and adds some interest onto the card. My second card features Altenew’s Leafy Wreath die and Season’s Tweetings  stamp set. I first embossed a

AECP: For the Guys

Image
 Hello, Welcome back! Today I had fun creating cards for the guys. This course provides practical ideas and tips such as using geometric shapes for the card front design, die cut or fussy cut a stamped image with an ink blended background and using interactive element to make an interesting masculine card. I used Altenew’s Leaf Medallion  stamp set to create my first card.  Using my MISTI tool, I started by stamping the largest stamp with a light green ink. The second largest stamp is inked with a slightly darker green ink. I embossed the third largest stamp set with a gold embossing powder, before continuing to stamp the fourth and fifth stamps with a darker green ink each time. I like that this card is simple to create and the gold embossed leaves gave it some interest. The different gradients of green makes the card pop from a white background. I added a sentiment from the same stamp set and added a green backing to the sentiment strip. Then, I foam mounted the sentiment onto the st

AECP: Easy Ink Blending Techniques

Image
 Hello, Welcome to my blog. Today I will be sharing some easy ink blending techniques that I learnt from Altenew. Ink blending is really fun and I have enjoyed creating some cards with my inks.  My first card features Altenew’s Dandelion Wishes stamp set. I die cut a rectangle from a card stock to create a window. Using Altenew’s inks, I blended some purple, orange and pink ink to create a colored background. Once the background is done, I stamped the dandelions in Versafine black ink. This silhouette effect is really beautiful as the black solid image against the colored background creates a clean and simple look. To finish this card, I added a black card stock on the back of my panel and then mounted it onto the front of a card. I left a strip of white on both sides of the card to have some contrast. I did not add any glitter or sequins to this card as I want the focus to be on the stamp and colored background. I used Altenew’s Line Art  stamp set for my second card. I stamped the s